Stronghold: Springside Quay
Crackdown 2 Walkthrough and Guide
Stronghold: Springside Quay
Before you can get started on Project Sunburst, you must recover the Beacon Prototype from the Cell Stronghold in Springside Quay. The Springside Quay stronghold consists of two Tactical Locations, both of which are marked on the tracker in the bottom-left corner of the screen with separate red “C” icons.
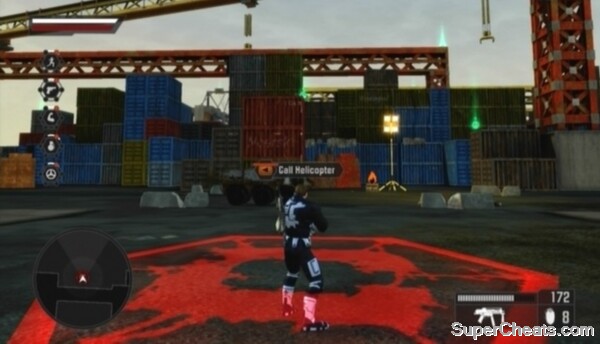
To initiate a tactical assault on the stronghold, you must stand on the Cell symbol the icon on the tracker is pointing to and press the Back button to call for an Agency Helicopter. Once you've done that, enemy soldiers will begin to enter the area. Each enemy will appear on the tracker as a red blip.
 Press the Back button while standing on a Tactical Location marker to initiate an assault. |
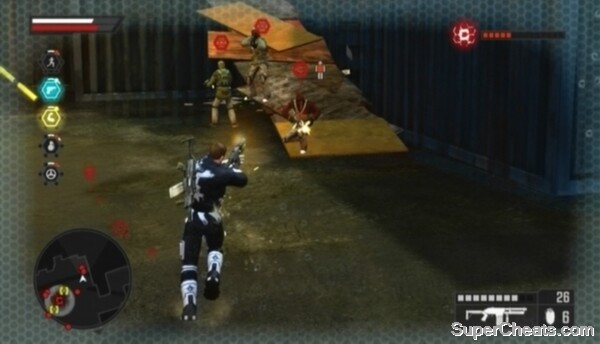
To take control of a Tactical Location once you've initiated an assault, you must kill enough of the Cell soldiers that spawn to deplete the meter in the top-right corner of the screen.
As you have yet to develop any of your Agent's skills, you may find it tough securing these first couple of locations. If your Agent is killed, you can have him redeployed at the nearest drop spot so you can get right back into the action. This may mean reinitiating the assault, however.
Tactical Location: Springside Quay
The first Tactical Location at the docks entrance is littered with explosive materials. Use these to your advantage. A flame icon appears above explosive items, so target these items when one or more enemies are close by and set it off with gunfire.
Your Agent is currently equipped with an SMG and Shotgun. The Shotgun is a powerful weapon that works best at close-range. Because your Agent's health and shield are low, it's best to stick with your SMG and Grenades when facing more than one soldier. If there's a lone soldier, you can run up with your Shotgun and blow him away.
Once you've helped the Peacekeepers secure the docks entrance location, make your way to the next Tactical Location marker further south.
Tactical Location: Container City
The marker for this location is on the central elevated platform. Clear all of the enemies surrounding the marker before calling a helicopter.
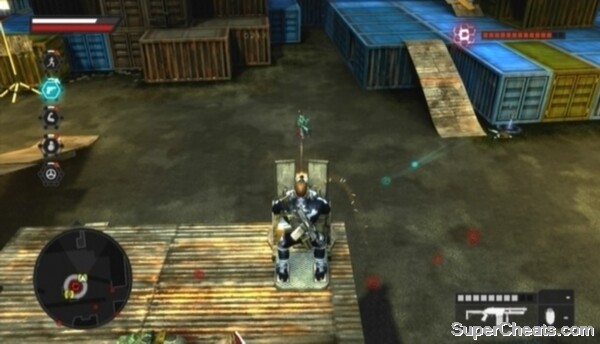
 Agents with a level three Strength skill can remove turreted weapons from their housing. Until then, using a turret will leave you immobile and vulnerable to enemy gunfire. |
There are two turrets on the central platform, but these are of limited use at this point since you're left immobile while using one. Once you've increased your Agent's Strength skill to level three, he'll be able to detach turreted weapons and carry them around.
If you're playing solo, it's best to drop down from the elevated platform once you've called the helicopter, as using one of the turrets on the platform would leave you open to enemy gunfire. If you're with one or more other players, one or two of you can get on the turrets on the central platform while the others sweep the area below.
There are several explosives in this area, so use them to your advantage if there are enemies nearby.
If your Agent's shield is down and his health is low, duck into one of the open containers surrounding the central platform and remain inside until his health and shield are back up. There's one such container just north of the central platform (one of the blue containers by the makeshift ramp). Just make sure you have your Shotgun equipped to deal with any soldiers that come after you.
Once you've captured both Tactical Locations, your next objective is to start activating the three Absorption Units tied to the Beacon inside the Power Station. Before you get to that, it would be worth upgrading all of your Agent's Skills to at least level two. When you attain Firearms level two you'll unlock the Assault Rifle and UV Shotgun, two weapons that serve you well when it comes time to tackle the next objective.
 Using non-explosive weapons to kill Cell soldiers and Freaks will increase your Agent's Firearms skill. |
Upgrading your Agent's Agility skill requires collecting the green Agility Orbs scattered around the city. There are many easy-to-reach Agility Orbs around the docks; you'll need to collect about 10 to attain level two -- less if you're playing on the Tough or Fragile difficulty levels. This guide includes a map showing the locations of all 500 Agility Orbs in Pacific City, so refer to the “Agility Orbs” section before you get to collecting.
More Crackdown 2 stuff on SuperCheats

No comments yet. Tell us what you think to be the first.